USB Driver
We use the USB drive of pixhawk . If you have not installed the driver, please download the laste driver. If the driver has been installed correctly, you will find the descriptions in the Device Manager. Currently, the config tool only supports Windows.
* Windows: PX4 Driver Installer for Windows Download (32/64 bit systems)
Firmware Update
* Windows: PlayuavOSD config tool (32/64 bit systems)
The config tool is portable, so no need to install. Extract the zip file and open the configuration tool(OSD_Config.exe), choose the port and click “Firmware Update” to install or update the firmware. The latest version will be downloaded and installed automatically. If you are already using the latest version, the program will verify it anyway.
Parameter Setting
When open the configuration tool, you will see the default parameters instead of the parameters saved on the OSD board.
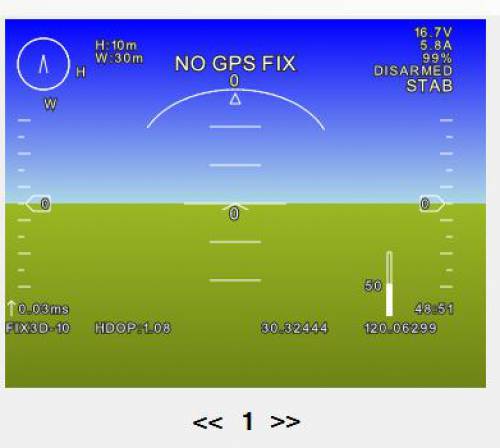
The configuration tool has a HUD to simulate the screen display. It means you need not plug your OSD board to FC and screen. You can write the parameters to OSD board until you get a favorite HUB.(NOTE THAT-it is just a simulation. There will be slight different from the actually screen)
You can choose to display or not to display the parameters, the specific display position and page, font size, and the alignment. Please refer to the instruction below for particular use.
On the right side of the page, you will find some buttons. Below is the use of each button.
- Read params - Read the parameters saved on the board. Generally before configuration, you should read the parameters and then modify as per your need.
- Save to memory - Usually parameters setting cannot be done in one step, especially the adjustment of display position. When you finish, click this button to have your setting saved in the memory of the board. Connect to the screen and you will see the settings work.
- Save to flash - To click this button, the parameters will be written in the flash of OSD board. The use of this function will wipe chip flash. Frequent use is not recommended. Modify your parameters and save them in the memory repeatedly until you are satisfied. Then click the “Save to flash” button.
Menu
- File:Load OSD File - Read parameters from saved parameter files.
- File:Save OSD File - To save the parameters displayed on the current interface into a file.
- File:Load default params - will load the default parameters
- File:Load custom firmware - flash a custom firmware to OSD
Parameter instruction
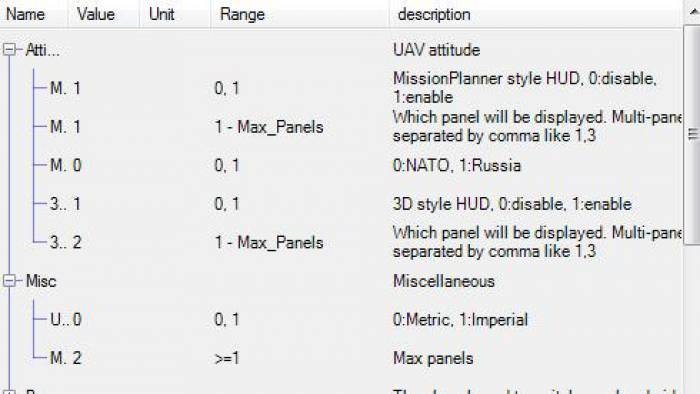
General parameter attributes include: display or not, display panel, display position, font size and alignment.
- Flying attitude - There are two ways to demonstrate the flying attitude of the aircraft(yaw, roll, and pitch). One is similar to Mission Planner. The other is 3D. Currently the 3D mode needs further improvement. Choose the one you like. Or you can start both but put them in different pages.
- Miscellaneous –Unit - You can choose Metric unit or Imperial unit.
- Miscellaneous - Maximum page number: Page switch is realized through cyclical pattern. When specify page for information display, do not input a number larger than the maximum number, or it cannot be displayed.
- PWM - Dual video switch and display page switch are both realized with the remote control channels through cyclical pattern. If you do not have the dual video, or you do not want to have multi-page display, disable relevant functions. Channel is to set which channel of the RC should be used for switch. Channel Value is a value that when the channel input is larger than it, the switch function will be triggered. The default value of 1200 is applicable for most RCs. You can have the value tested on ground by connecting the OSD, the flight controller(battery power recommended) and the screen.
- Height&Speed - There are two ways to display height and speed, one is the scroll bar, and the other is digit. Configure according to your preferences. The height here is not the elevation value, but height from Home. The speed refers to the ground velocity.
- Orientation, Home Direction, Waypoint Direction - We display the three directions together in two ways, one is the track bar, and the other is the map-like way, with north on the top. Configure according to your preferences.
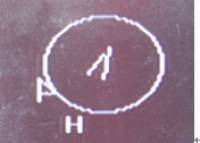
In the above diagram, the aircraft is flying at northeast 1 degree. The home(H) is at northeast 30 degrees. The next waypoint(W) is at northeast 60 degrees.
This method can only display the general direction. There is no precise number. From the above diagram we can see that the aircraft is flying toward northeast and the home(H) is located at its south by southwest. The next waypoint(flag) is at its west by southwest.


